Table of Content
The materials used in the video include buttons, bottle caps, an old lipstick tube, little cube blocks, and a few other scraps lying around. The process to make the stamp is very easy and this DIY explains three different methods you can use, so be sure to choose a method that suits your needs. Looking to add an extra special touch to a letter or wedding invitation?
The second method is to make your own seal with plywood and sealant. Finally, you can close off the fireplace’s opening, but this is a less permanent option. I mentioned in the supply list that the metal buttons work best for this. This plastic button did work but it was a little bit sticky. Another plastic button I tried did not work at all and I ended up tossing it. Start by placing your wax stamp on an ice pack and lighting a candle.
Shape the stamp:
Envelopes are inexpensive to send little surprises, appreciations, or just a “thank you” note. They look so impressive when beautifully crafted and sent in the mail. And it’s so much fun to create your own unique wax seals for each of your letters using Sculpey clay and other supplies. This DIY project will provide the tools, materials, and step-by-step instructions to get started so that you can make your mark with these unique stamps.

Fireplace and chimney safety is of the utmost importance, especially when the weather starts to change. By sealing your fireplace and chimney, you will reduce the chances of fires and other chimney-related problems. If you’re tired of your fireplace starting up again every time the cold weather rolls around, you can close it off permanently with a sealer. The best DIY option is to make your own insulating foam board seal. There are two ways to close off a chimney permanently. First is through buying a pre-made seal, which you can easily install in your fireplace.
DIY Chocolate Wax Seals
I tried using grape Kool Aid powder for getting a purple batch and it turned out so dark that my little gummy bears look brown. I will also try using dollar store eye shadows for color and shine . I replaced the candle as heat source with a home made alcohol lamp because I hate the sooty deposit from candles. I made a small lamp for heating my spoon and a larger lamp for some serious heat for making the batch of sealing wax. Bottom line is - thanks for sharing this information. My projects aim to be simple while also being Eco and budget friendly with a sense of humor or a sarcastic twist.

Remove the hardened tallow and store it in air-tight containers. You can keep the tallow whole or cut it into smaller pieces before storing it in an air-tight container to prevent oxidation. You can store the tallow at room temperature, your fridge, or the freezer for about a year. Let the tallow cool for about 8 hours and harden completely. Leave the jars open in an area where they won’t be disturbed. Cooling and hardening will typically take about 8 hours, so you could just let the tallow sit out overnight.
Wax Seal Stamp DIY Tutorial
Give your stamp a test pull after waiting for the sealing wax to cool. If you feel the stamp sticking, wait another 5-10 seconds and try again. Don’t leave the stamp in the wax for longer then a second otherwise it might get stuck. To get the best out Of your wax seal stamp, you have to have determined what you'll be using the wax seal stamp on. Most papers will do just fine, but it might be best to use a double-sided adhesive to place your seals if you are using heavily waxed paper. This way, it could even work on wood, glass, or any other tough surface.

Use an Allen wrench to loosen the hex bolts that hold the metal closure plate on the fireplace flue. Fireplaces can be a charming element in your home and are perfect for cold winter nights. However, if you have a chimney and never use it, it may be a good idea to seal it off. That way, your home does not lose climate-controlled air, and you do not get strange drafts into your home. Cut a small hole in the cork to recess the shank of the button into. You can cut the shank off if you want but I decided to just keep them on and cut the cork to fit.
Step 11: Removing Foil and Finishing Touches
The whole point of making your wax seal stamp is being more in control of how it looks and this is what this DIY homemade wax seal tutorial gives to you. Are you looking for a decorative stamp to add a unique element to your envelopes? Do you want to give your correspondence a personal touch? With this DIY Wax Seal Stamp, you can transform your mundane mail into impressive pieces. We prefer to use the electric hot plate for the mass production. It is the easiest and convenient to make a perfect wax seal on letters and envelops.
Makes a great gift for anyone who likes to write letters on paper and seal them with wax. If you've ever wanted to add a personal touch to your stationery or business documents, this is the perfect DIY project for you! Create your own unique wax seal stamp to use on all of your correspondence and official documents. This quick tutorial teaches how to fashion your stamp with a few basic materials.
There are even more options on how you want to do this, but one of the simplest ways is through a fireplace balloon. You can do this yourself, but if you want it to last, you can call in a professional to take care of it. The first option is to seal off the opening to the fireplace. This can be a permanent measure, but it is not as secure as sealing the chimney itself. It is great if you are not having significant issues with your chimney and just want to seal up the hole. You’ve successfully closed off the fireplace opening.
The first option to closing off your fireplace chimney is to actually just close off the opening. You will most commonly install a new metal cover that will close off this opening to your home. It can prevent the wind and snow from blowing into your home. And you can often find decorative covers, so it looks more appealing. Once your envelopes are addressed and sealed you are ready to stash them in your corset and make haste to the nearest postal office.
Free Printable Wedding Templates View our free wedding printable invitation collections! After removing the plate, screw in a new metal closure plate and tighten the hex bolts using a socket wrench. Create a keepsake for a loved one by adding a name patch to a shirt or other item. Be inspired by original DIY craft projects for all skill levels. Next time I’ll try using a stove lighter with the button safely away from the fame, like these – Butane stove lighters. One even has a crest on it with the letter C, how fitting, (although it’s reversed in the impression).

After pouring your wax, carefully press the stamp into the wax while it is still hot and allow it to rest for a few minutes. I recommend waiting longer than you think you will need to —because the sculpey clay absorbs the heat rather than cooling the wax, it will take some time. This awesome project costs next to nothing if you already have the equipment. And if you don’t, the tools come in handy for a lot of other things and will eventually pay for themselves. We created a stamp that we can use to make wax seals on envelopes and other paper, with a custom bee design. We used it for a few hand-delivered invitations, and the possibilities for other uses are endless!
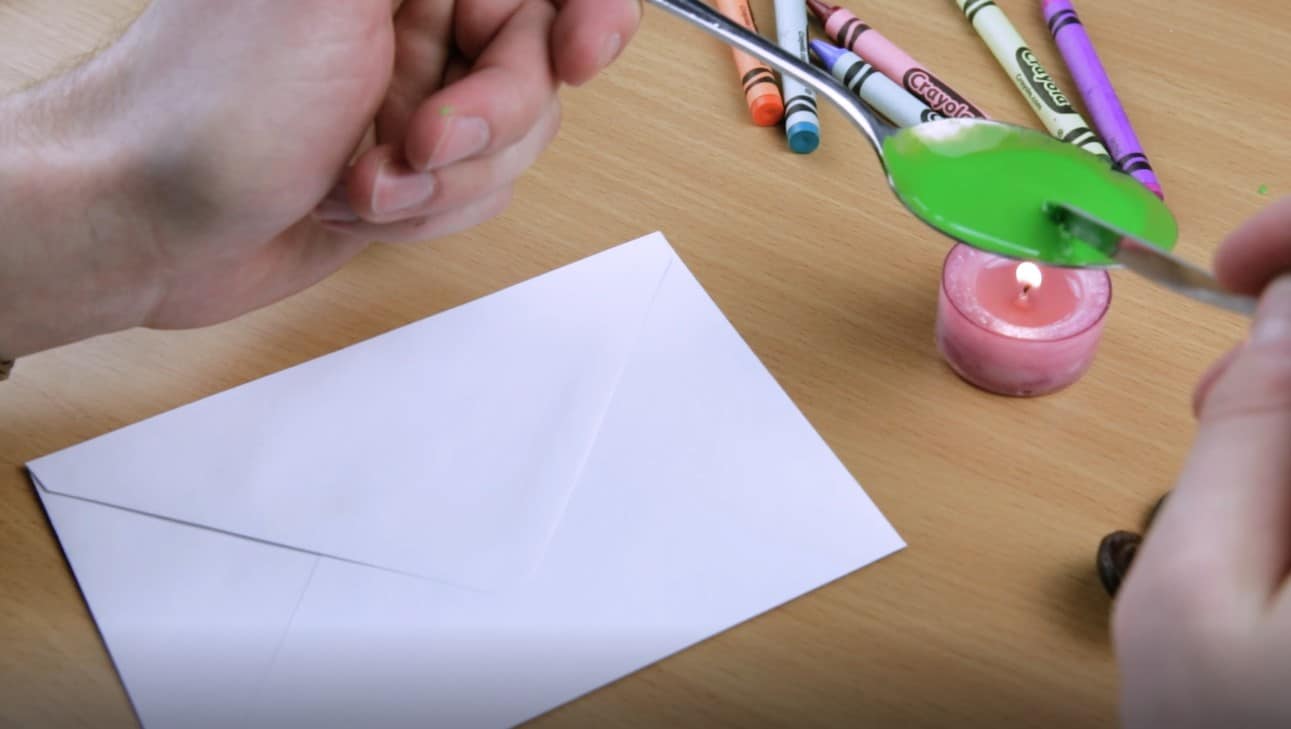
You can make different kinds of wax at home for a variety of purposes! If you want to skip the salon, you can whip up a simple sugar wax for hair removal in about 10 minutes. You can also render beef fat to create another kind of wax, called tallow, which you can use to make candles, soap, and other beauty products. If you are using candle and spoon, it is suggested to cut the sealing wax into small pieces, around 0.8~1cm. It is easier to control the wax amount for each seal.

I used a regular hot glue stick that I had cut into small pieces. I poured the melted wax into a silicone cupcake liner. Once hardened, I cut it into small pieces for easier use in a spoon later. The materials needed to make a wax seal stamp are not very expensive.


No comments:
Post a Comment